Chargebee Looker Studio Connector
Connect Chargebee to Looker Studio (formerly Google Data Studio) to automate your reporting and create insightful and actionable dashboards.
Start Making Data Driven Decisions Using The Chargebee Looker Studio Connector
The Chargebee Looker Studio connector allows you to get data from Chargebee into Looker Studio, including:
Credit Notes, Coupons, Customers, Hosted Pages, Invoices, Item Prices, Items, Orders, Quotes, Subscriptions and Transactions.
How It Works
1
Sign-Up to a Plan
Sign-up to the Solo Plan using a Google Account. Use the same account to use the Chargebee Looker Studio Connector.
2
Connect Chargebee to Looker Studio
Authenticate and connect Chargebee Sites to Looker Studio.
3
Start Creating Actionable Chargebee Dashboards
Use data from Chargebee to create Actionable Dashboards in Looker Studio.
Pricing To Suit The Stage Your Business
Connector prices are based on the plan you choose/have
Solo
For a user who needs one to a few connectors, usually for their own needs
$
0
/mo
- 1 User
- First Chargebee account free
- All other connectors one or more accounts free
- Additional Users
Chargebee Sites
USD Monthly
Consultant
For a user that needs many different connectors. Eg to work with many clients
$
60
/mo
- 1 User
- First Chargebee account free
- All other connectors one or more accounts free
- Additional Users
Chargebee Sites
USD Monthly
Team
For multiple users needing many connectors. Eg staff of an agency with many clients
Coming Soon!
$
120
/mo
- 3 Users
- Additonal Users ($5 each)
Sites
USD
How To Get Started?
First Sign Up to a Plan
Create a Google Account if You Don't Have One
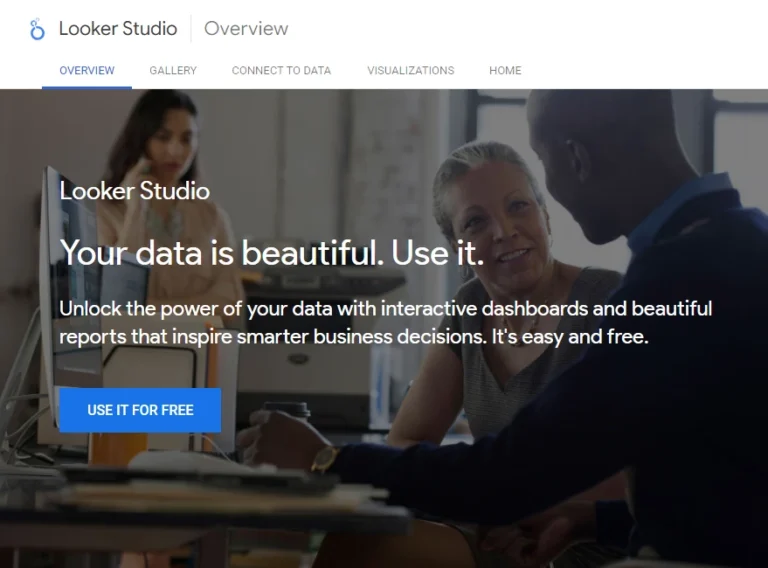
If you are not signed into a Google account in the browser you are using when you click the Try button, you will be carried to the Looker Studio Overview page.
When you click the USE IT FOR FREE button, you will be presented with Sign in with Google screen. Sign in with a Google Account or click Create account to the bottom of the page to continue to Looker Studio.
Choose a Google Account to Sign-Up
Sign up and access to the connector is based on the Google Account used. Make sure you are signed in to the Google account you want to use in the same browser before you click try.
For users that use many Google Accounts in chrome however, it can be tricky to select the account you want to use, if it is not the default account. This is because the current behaviour of Looker Studio sends the user to the home screen when they attempt to change their account from the default, using the Google Account selector to the top right. The easiest way around this is to make sure to set up a Profile in Chrome for the Google Account you want to use, and switch to that Profile.

Start to Authorise Looker Studio to Use This Connector
In order to get your Chargebee data into Looker Studio, your Google Account must Authorise the Chargebee Looker Studio Connector to connect to Chargebee.
Click the AUTHORISE button start the process.
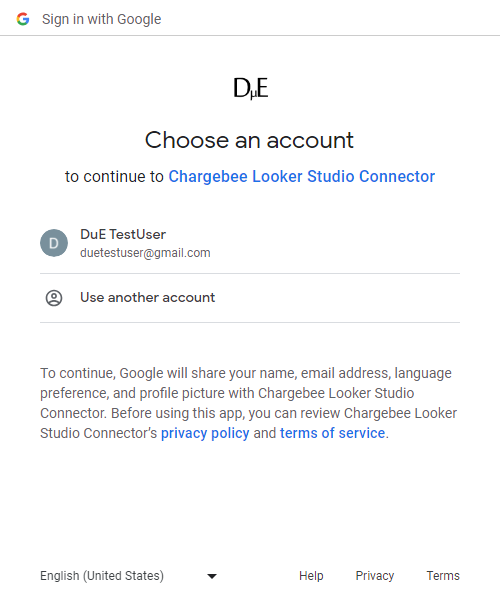
Select a Google Account to Authorise the Connector
If the Google Account you want to use is in the list presented, select it. If it is not, select Use another account. This account will be used both to use the Chargebee Looker Studio Connector and Sign-up with a Plan.
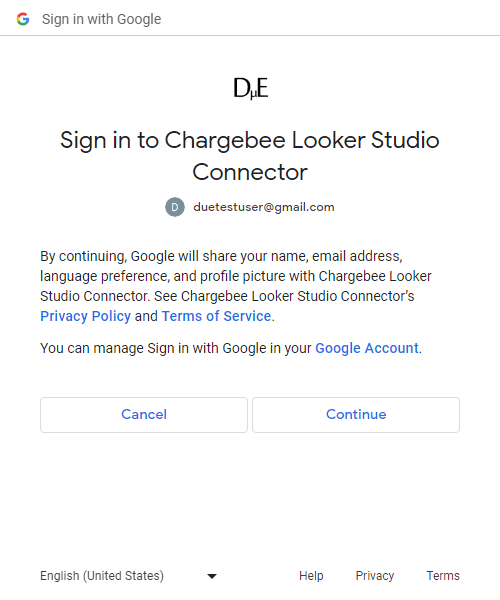
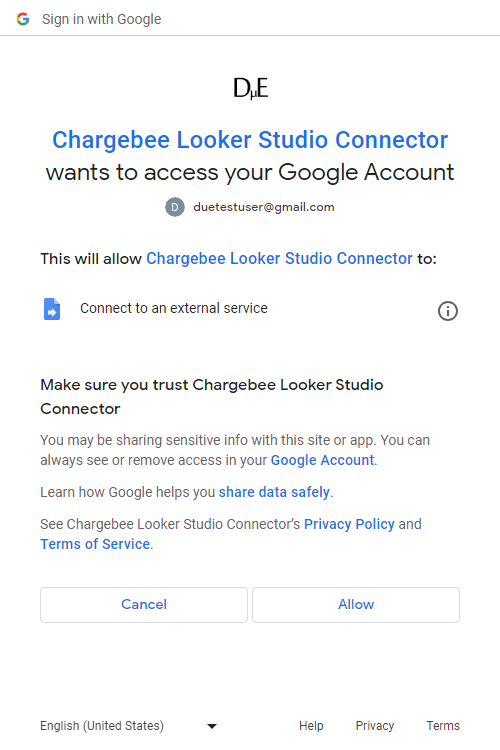
Review What is Shared
Review what your Google Account will share with the Chargebee Looker Studio Connector and click the Continue button.
Authorise the Connector
In order to connect your Chargebee data to Looker Studio the Chargebee Looker Studio Connector must be allowed to Connect to an external service.
Click the Allow button to Authorise.

Select a Plan
- Select the free Solo Plan to get started.
- Click Next until the Autorisation screen in presented.
- Click the AUTHORISE button to begin signing up to the Solo Plan
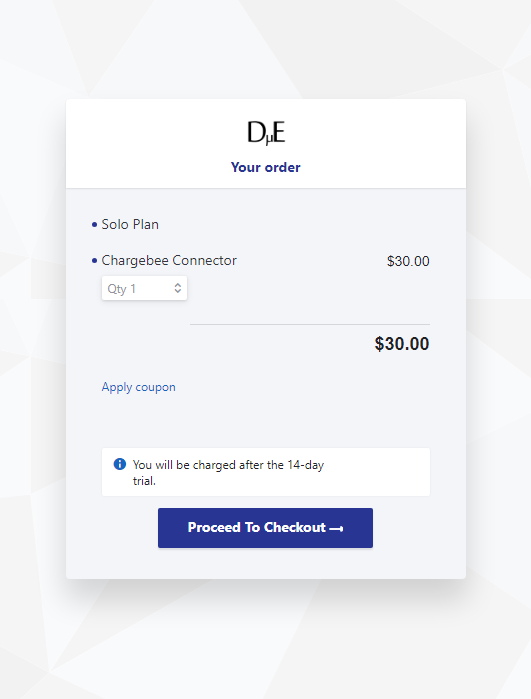
Review Your Order
Review the order and click Proceed To Checkout.
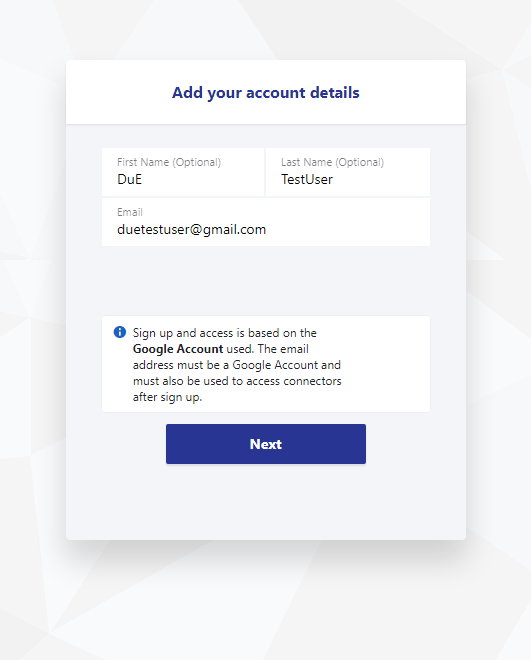
Enter Your Name
Enter your first and last name.
By default the email of the Google Account you used with Looker Studio is populated (if changed it must me an email of a Google Account you intend to use with Looker Studio).
The email used will also be the main email associated the subscription.
No billing information is required to get started!
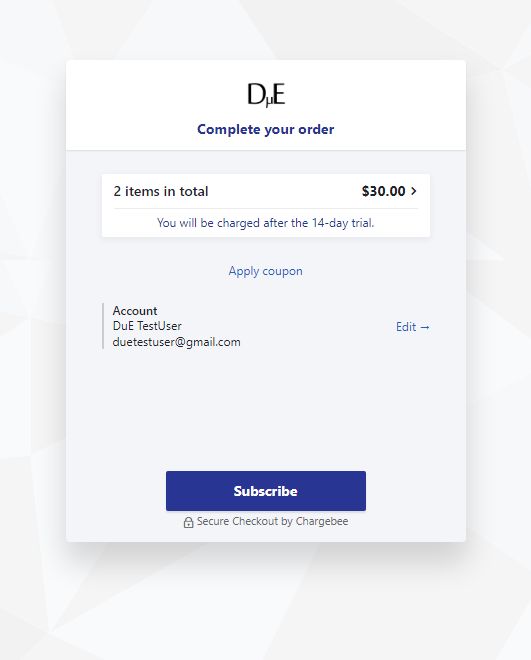
Complete You Order!
Click the subscribe button to get the Solo Plan.
Connect Chargebee to Looker Studio
Create Read-Only Chargebee API Key
A Read-only Chargebee API Key in needed to use this connector. Follow the following steps to create one:
- Log into Chargebee.
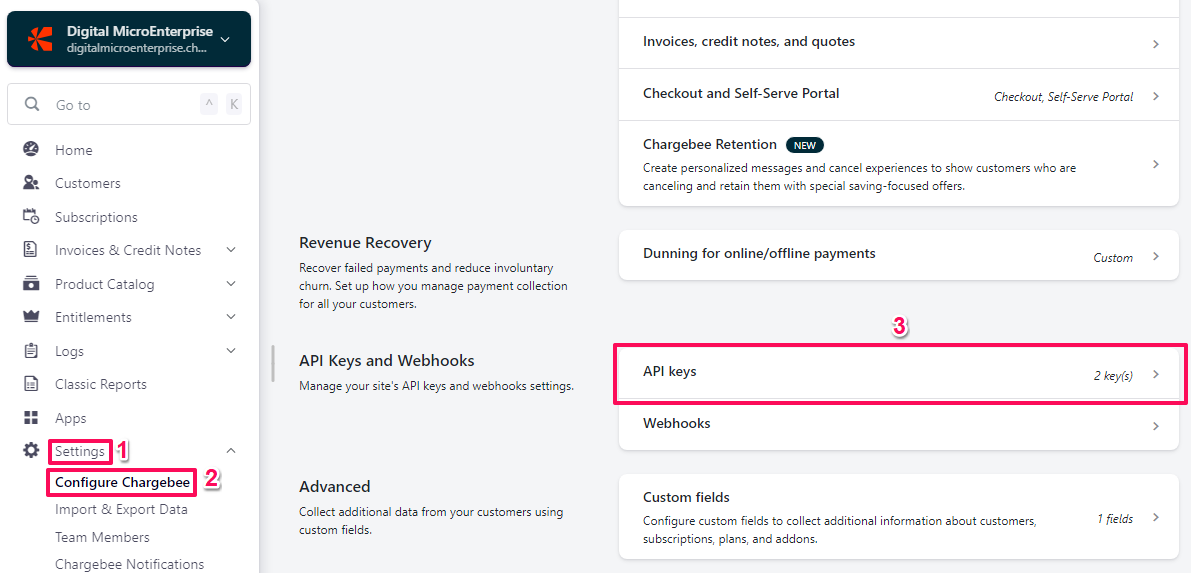
- Select Settings > Configure Chargebee.
- Scroll down to the API Keys and Webhooks section.
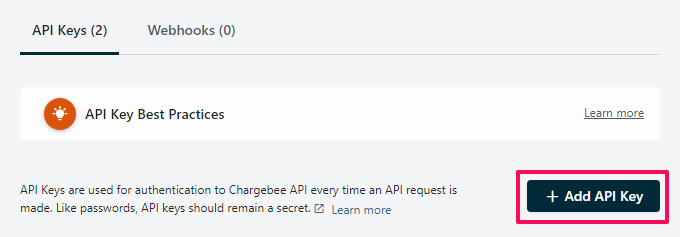
- Click API keys.
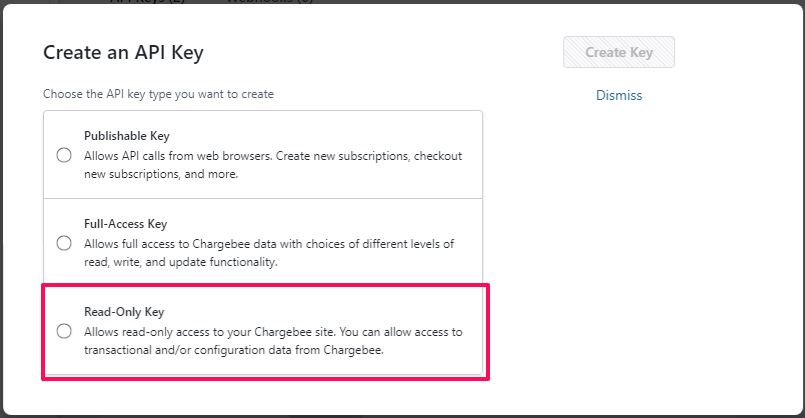
- Click the Add API Key button.
- Select Read-Only Key.
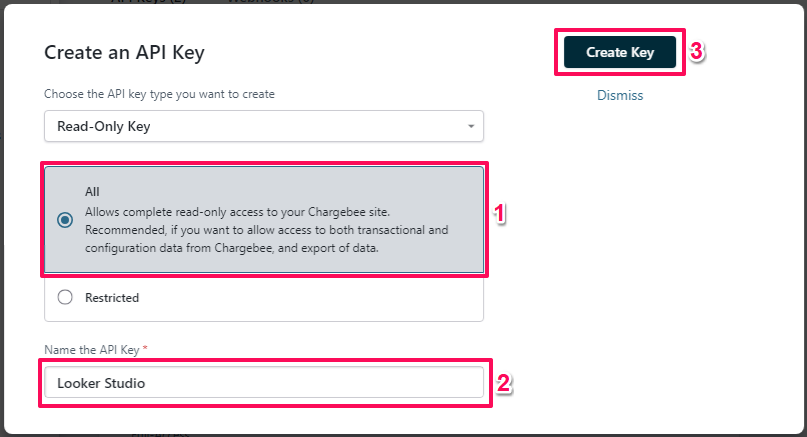
- Select All and then enter a name in the Name the API Key field.
- Click the Create Key button.
Add An Account
- Select Add an Account from Connector Management.
- Click Next until the Credentials screen is shown.
- Enter your Chargebee subdomain into the Path field. (You can find your Chargebee subdomain in the URL when you log in to Chargebee. For example, yourcompany is the subdomain of yourcompany.chargebee.com)
- Enter your Chargebee API Key into the Key field.
- Click the SUBMIT button
About Chargebee
Chargebee is a subscription management and billing platform that streamlines subscription billing, invoicing, and revenue recognition for businesses. It’s particularly beneficial for subscription-based businesses, offering automation and integration with payment gateways and accounting software.
About Looker Studio
Looker Studio (formerly Google Data Studio) is a visualisation and reporting tool offered by Google. With Looker Studio, users can connect, transform and visualise data from various sources, creating dynamic and interactive reports and dashboards. There is a free and a paid (Pro) version of Looker Studio
Frequently Asked Questions
Do I need to enter a payment method to try the Chargebee Looker Studio Connector?
No, no payment method is needed to try the Chargebee Looker Studio Connector.
